This article contains affiliate links. We may earn a commission if you buy through our links, at no extra cost to you.
Best Home Office Setup Under $500 in 2026
Most people building a home office for the first time make the same mistake: they buy a nice desk, a cheap chair, and wonder why their back hurts after three weeks. The best home office setup under $500 is absolutely achievable in 2026 — but only if you allocate the budget in the right order. After researching dozens of component combinations across every price tier and comparing what remote workers actually need versus what looks good in photos, here is what actually works when $500 is your hard ceiling.
This guide builds a complete, functional home office setup — monitor, keyboard, mouse, chair, and desk mat — for under $500, with a section of optional upgrades ranked by priority for when the budget allows.
Quick Answer: The best home office setup under $500 centers on the LG 27QN600-B 27″ 1440p monitor (~$200), Hbada Ergonomic Chair (~$130), Keychron C3 Pro keyboard (~$40), Logitech M330 Silent mouse (~$30), and Logitech Desk Mat (~$30). Total: ~$430 — leaving $70 for the first upgrade on the list.
The Priority Order Most People Get Wrong

Every guide to building a home office setup under $500 has a priority problem. The instinct is to start with what’s visible — a nice monitor, a clean keyboard, a matching desk mat — and treat the chair as an afterthought. That instinct is wrong, and it’s the reason most people are still buying a new chair 6 months after building their “complete” setup.
The chair is the component that touches your body for 8 hours a day. A bad monitor gives you eye strain. A bad chair gives you chronic back pain, fatigue, and posture problems that compound over months. The honest truth is that $500 spread across a setup with a $50 chair is a worse investment than $500 with a $130 chair and a slightly smaller monitor.
The counterintuitive point: the best home office setup under $500 doesn’t look as impressive in photos as a setup with a $280 ultrawide monitor and a cheap chair. It performs significantly better in real use, every single day, because the person sitting in it isn’t shifting positions every 20 minutes trying to get comfortable.
Priority order for this budget: chair first, monitor second, keyboard and mouse third, desk mat last. Follow that order and you’ll have a setup that serves you well for years. Invert it and you’ll be buying a chair again before the year is out.
For the peripheral upgrades that come after the base setup is solid, see our guide on the best mouse for home office — when you’re ready to step up from the M330, that’s where to look.
The $500 Home Office Setup — Complete Base Build
| Component | Product | Price |
|---|---|---|
| Chair | Hbada Ergonomic Mesh Chair | ~$130 |
| Monitor | LG 27QN600-B 27″ 1440p | ~$200 |
| Keyboard | Keychron C3 Pro | ~$40 |
| Mouse | Logitech M330 Silent Plus | ~$30 |
| Desk Mat | Logitech Desk Mat Studio | ~$30 |
| Total | ~$430 |
This leaves approximately $70 of the $500 budget for the first upgrade on the additions list — most likely a laptop stand or cable management tray depending on your desk situation.
The Components — What Each One Does and Why It Made the List
1. Hbada Ergonomic Mesh Chair — The Foundation (~$130)
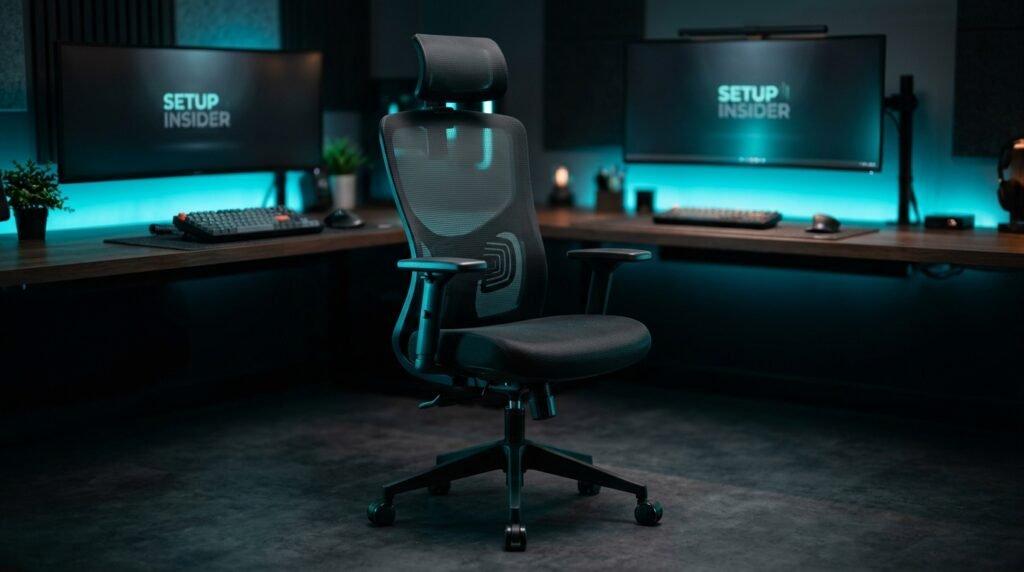
The Hbada Ergonomic Mesh Chair is the component that separates this setup from every guide that treats the chair as optional. Adjustable lumbar support, height-adjustable seat, breathable mesh back, flip-up armrests, and a headrest — the full ergonomic feature set that most chairs in this price range compromise on at least one of. The mesh back keeps you cooler than foam-padded alternatives during long work sessions, which matters more than it sounds for afternoon focus.
At $130, the Hbada sits at the inflection point where genuine ergonomic support becomes achievable. Below $80, you’re getting a chair that looks like an office chair but lacks the lumbar support and adjustability that prevent back fatigue over hours. The flip-up armrests are the specific feature that most budget ergonomic chairs skip — they allow you to get closer to the desk surface without the armrests blocking the movement, which directly affects wrist and shoulder positioning during typing.
A remote worker who switched from a $60 dining chair to the Hbada reported eliminating his 3pm back pain within the first week — not from any other change, just the chair.
Pros: Full ergonomic feature set at budget price, mesh back for airflow, flip-up armrests, adjustable lumbar, headrest included, 3-year warranty. Cons: Build quality below $200+ chairs, lumbar adjustment less refined than premium options, plastic base rather than aluminum, assembly takes 30–45 minutes.
2. LG 27QN600-B 27″ 1440p Monitor — The Display (~$200)
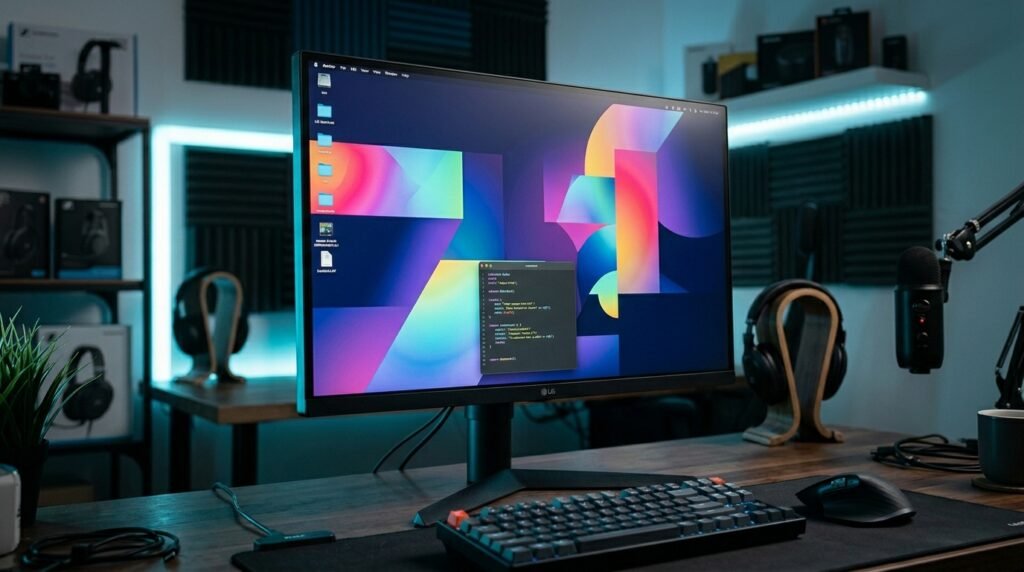
The LG 27QN600-B is the monitor that makes this setup possible without compromise on display quality. 27 inches, 2560×1440 IPS panel, 75Hz refresh rate, HDR10 support, and LG’s reliable color accuracy that makes text and documents genuinely comfortable to read for extended periods. At 1440p on 27 inches, the pixel density (108 PPI) produces noticeably sharper text than 1080p at the same size — the difference is immediately apparent for anyone doing sustained reading and writing work.
The IPS panel technology means wide viewing angles and accurate color reproduction without the washed-out look that VA panels produce at off-center viewing positions. For a home office where you might lean back, look at the monitor from a slight angle, or share the screen during calls, IPS is the right panel technology at this price tier.
The monitor connects via HDMI or DisplayPort — no USB-C docking at this price point, which means you’ll need your laptop charger separately. That’s the meaningful trade-off versus pricier monitors, and it’s worth accepting to keep $80 in the budget for the chair.
Pros: 1440p IPS for sharp text, 27-inch productivity sweet spot, 75Hz for smooth scrolling, HDR10, accurate color out of box, reliable LG quality. Cons: No USB-C, no built-in hub, stand limited to tilt only (no height adjust without aftermarket arm), 75Hz is adequate but not premium.
3. Keychron C3 Pro — The Keyboard (~$40)
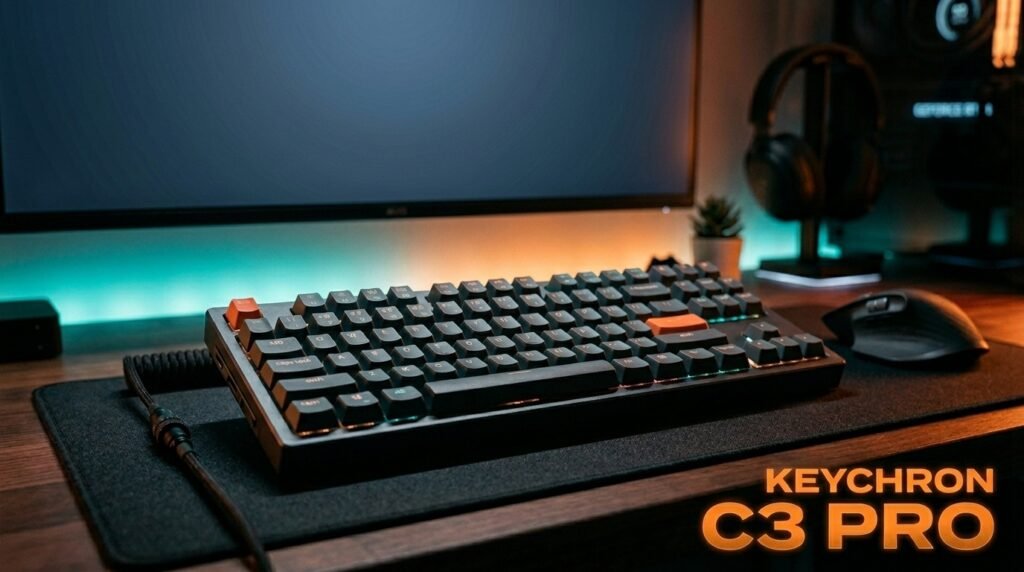
The Keychron C3 Pro answers a question every budget home office builder eventually asks: can a mechanical keyboard under $50 actually be worth it? Yes — and the C3 Pro is the specific reason that answer exists. Genuine Gateron Red mechanical switches, tenkeyless layout that saves meaningful desk space, hot-swappable switch sockets for future customization, and Mac/Windows compatibility via a physical toggle switch.
At $40, it delivers the core mechanical keyboard advantage — tactile key feedback, consistent actuation, and a typing experience that measurably reduces error rates and fatigue versus membrane keyboards — at a price that doesn’t compromise the chair or monitor budget. The tenkeyless format is the right choice for most home office setups: it brings the mouse closer to the body centerline, reducing shoulder extension that causes fatigue during long mouse-heavy workdays.
What most reviews won’t tell you is that the C3 Pro is the keyboard Keychron fans recommend to friends, not because it’s cheap, but because it’s genuinely good enough that the upgrade itch takes years to arrive rather than months.
Pros: Genuine Gateron switches, hot-swappable sockets, tenkeyless layout, Mac/Windows toggle, RGB backlighting, $40 price point. Cons: Wired only, RGB software requires Windows app, stabilizers benefit from lubing for premium feel, no wireless option at this price.
4. Logitech M330 Silent Plus — The Mouse (~$30)
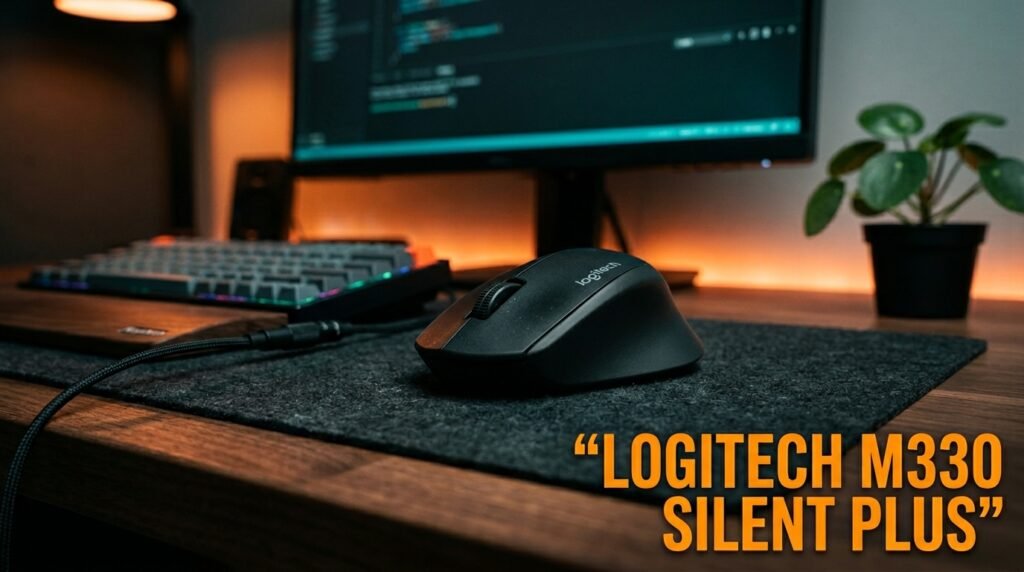
The Logitech M330 Silent Plus handles every productivity mouse task reliably without drama. The 90% quieter click mechanism is the defining feature — relevant for shared home spaces, video calls, and any environment where the mechanical click of a standard mouse creates noise that others notice. 1000 DPI optical sensor covers any productivity task comfortably, and Logitech’s ergonomic right-hand contour fits medium hands through full workdays without discomfort.
Two AA batteries last approximately 24 months — an almost absurd battery life that means this mouse is functionally maintenance-free for two years of daily use. The 2.4GHz USB nano receiver provides more reliable wireless connectivity than Bluetooth in signal-congested home environments. At $30, the M330 is the correct mouse choice for this budget — spending more on a mouse at this tier takes budget away from the chair or monitor where the daily impact is larger.
Pros: 90% quieter click, 24-month battery life, reliable 2.4GHz connection, ergonomic right-hand shape, $30 price point. Cons: Right-hand only, no Bluetooth, 1000 DPI max, no side buttons, nano receiver occupies a USB port permanently.
5. Logitech Desk Mat Studio Series — The Desk Mat (~$30)
The Logitech Desk Mat Studio Series at 27.6×11.8 inches unifies the keyboard and mouse zone into a single clean surface that elevates the visual quality of the entire setup for $30. The microfiber surface works with both optical and laser sensors, the anti-slip rubber base keeps it positioned through full workdays, and the color options — Graphite, Mid Grey, Rose — are genuinely well-designed rather than generic black.
A desk mat is the component with the highest visual impact per dollar in any home office setup. The same monitor, keyboard, and mouse look dramatically more intentional and organized sitting on a quality desk mat than floating on bare wood or glass. For a $500 build where every dollar has to work, the Logitech Desk Mat earns its $30 allocation by making the entire setup look twice as expensive.
Pros: Premium microfiber surface, multiple color options, full keyboard and mouse coverage, anti-slip base, Logitech quality. Cons: Lighter colors show dust visibly, 27.6″ width feels narrow on larger desks, stitched edges add slight thickness at the border.
Optional Upgrades — In Priority Order
Once the base setup is running, these are the additions ranked by daily impact per dollar spent:
Priority 1: BenQ ScreenBar — Desk Lamp (~$109)
The BenQ ScreenBar mounts on the LG monitor’s top edge, powers via the monitor’s USB port, and illuminates the desk with asymmetric optics that eliminate screen glare. Zero desk footprint, auto-dimming, 2700K–6500K color temperature range. The single highest-impact peripheral upgrade after the base setup is complete — lighting affects every hour of every workday and is the component most people add last but wish they’d added first. See our full guide on the best desk lamp for home office for a complete comparison.
Priority 2: Logitech C920x Webcam — Webcam (~$70)
The Logitech C920x delivers 1080p/30fps video with dual microphones that handle most home office video call situations without a separate microphone. For anyone on more than 2-3 video calls daily, the difference between a laptop webcam and a dedicated 1080p webcam is immediately visible to everyone in the call — sharper image, better low-light handling, and a more professional framing at eye level when mounted on the monitor.
Priority 3: Amazon Basics Laptop Stand — Laptop Stand (~$25)
The Amazon Basics Laptop Stand elevates the laptop to a better reference position alongside the LG monitor, improves ventilation for laptops running demanding tasks, and keeps the desk surface cleaner visually. Six height adjustments, aluminum build, folds flat for travel.
Priority 4: Anker 7-in-1 USB-C Hub — USB Hub (~$30)
The Anker 7-in-1 USB-C Hub solves the port problem that becomes apparent as the setup grows — the M330’s nano receiver, the keyboard cable, the webcam, and external storage all compete for the laptop’s limited USB ports. HDMI, 3×USB-A, SD card, microSD, and USB-C passthrough in one compact hub.
Priority 5: CCCEI Cable Management Tray — Cable Management (~$28)
The CCCEI Under Desk Cable Tray clamps to the desk underside without drilling and holds the laptop charger brick and any power strips completely out of sight. The single highest-impact aesthetic upgrade after the base setup — a clean desk surface with no visible cables makes the entire setup look significantly more intentional.
What to Look for When Building a Home Office Setup Under $500
1. Chair before monitor, every time The chair affects your body for 8 hours daily. A bad chair causes compounding physical problems — back pain, fatigue, posture issues — that no monitor or keyboard upgrade fixes. At this budget tier, the chair allocation should be $100–150 minimum, and the monitor budget should flex to accommodate it rather than the other way around.
2. 1440p over 1080p for sustained reading work At 27 inches, 1440p produces 108 PPI versus 1080p’s 81 PPI. That 33% pixel density increase translates to noticeably sharper text that reduces eye fatigue during sustained document work and reading. For a home office monitor used primarily for productivity rather than gaming, 1440p at $200 is the right specification target.
3. Mechanical keyboard — but not below $35 The mechanical keyboard advantage over membrane keyboards — tactile feedback, consistent actuation, faster accurate typing — is real and measurable for heavy typists. The quality floor where that advantage becomes worth the cost is approximately $35–40. Below that threshold, inconsistent switch quality and poor stabilizers undermine the typing experience the mechanical design is supposed to provide.
4. Prioritize additions by daily touchpoint frequency When adding to the base setup, rank upgrades by how often they affect your workday. Lighting (every minute you’re at the desk) ranks before a webcam (only during calls) which ranks before a laptop stand (passive benefit). Following this order ensures each dollar spent produces maximum daily return.
5. Leave budget room for the first upgrade A $500 budget that’s completely spent on the base setup leaves no room for the additions that make the setup complete. The base build at ~$430 leaves $70 for the BenQ ScreenBar contribution or a full laptop stand plus cable management. Build the base for $420–440, then allocate the remainder to the highest-priority addition.
FAQ
What is the most important component to prioritize in a $500 home office setup?
The chair — by a significant margin. It’s the component that physically affects you for every hour of every workday, and the one most people chronically under-invest in while over-spending on visible components like monitors and keyboards. A $130 ergonomic chair like the Hbada with a $200 monitor outperforms a $50 chair with a $280 monitor in real daily use within weeks.
Can I build a complete home office setup under $500 without a monitor?
Yes — if you already have an adequate monitor, the remaining $300 covers a quality chair ($130), mechanical keyboard ($40), mouse ($30), desk mat ($30), and leaves $70 for a lamp or webcam. If your current monitor is below 24 inches or 1080p on a large screen, the monitor upgrade typically produces more daily productivity improvement than any other single component change.
Should I buy a standing desk as part of a $500 home office setup?
Not at this budget. Entry-level electric standing desks start at $250–350, which consumes 50–70% of the total budget and leaves inadequate allocation for the chair, monitor, and peripherals. A fixed desk at $80–150 paired with a quality ergonomic chair produces better ergonomic outcomes for most people than a standing desk with a poor chair. Add a standing desk at the $800–1000 total setup budget tier where it doesn’t require compromising other components.
What should I upgrade first after the base setup?
The BenQ ScreenBar monitor lamp is the highest-impact first upgrade at $109 — lighting affects every minute at the desk and the ScreenBar’s zero-footprint installation adds it without cluttering the workspace. If you’re on video calls frequently, the Logitech C920x webcam at $70 is the alternative first upgrade for its immediate professional impact during calls. Choose based on whether your primary daily pain point is eye strain or video call quality.
Our Final Verdict
The best home office setup under $500 in 2026 starts with the decision most guides get wrong — putting the Hbada Ergonomic Chair first in the budget rather than last. Add the LG 27QN600-B for a 1440p IPS display that handles sustained work comfortably, the Keychron C3 Pro for a mechanical typing experience at $40, the Logitech M330 Silent for reliable wireless input, and the Logitech Desk Mat to unify the surface. Total: ~$430. Use the remaining $70 toward the BenQ ScreenBar as the first upgrade. Check current pricing on Amazon for all components in this guide.